Create a Beautiful Border
Creating a beautiful decorative border around my calligraphy work is like adding my personal stamp – reflecting my own style, inspirations and personality. It provides a frame to illuminate and bring out the sense or essence of the text.

Ideas and Inspiration
To start off, I think carefully about the calligraphy work itself – its origins, style of language and script. My work Lepidoptera (above) is an extract from a Victorian nature book. The language is eloquent and traditional. The copperplate script is suitably graceful and flowing. I have images of butterflies, foliage and Victorian grandeur in my head.

Colour and Design
Putting together a suitable colour scheme and a design for the border always means rough sketches and doodles and trying out different colours on patches of the same paper as the original calligraphy piece.
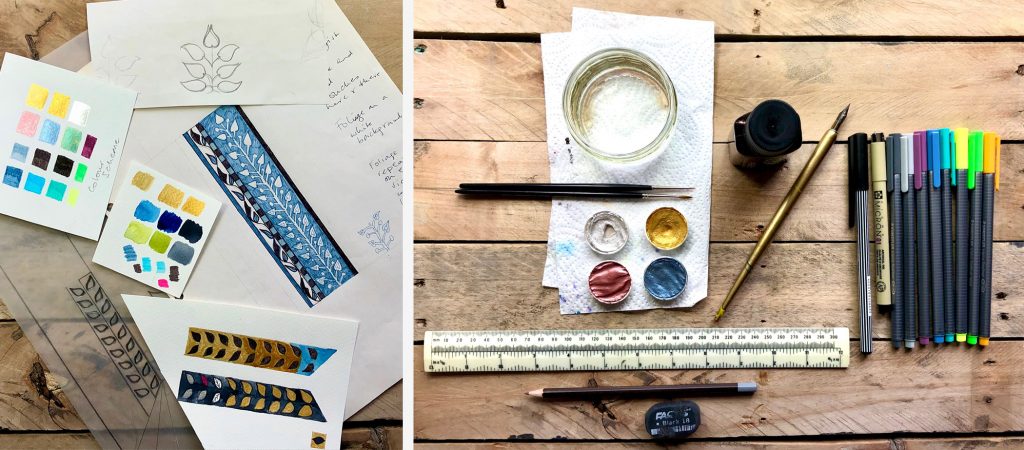
I try to visualise the look of the final artwork in my mind. What colours and tones would suit? What do I want to stand out? I have built up a collection of gold and silver watercolours to illuminate and highlight features in my pictures, and fineliner pens are great for sealing borders and adding little details where needed.
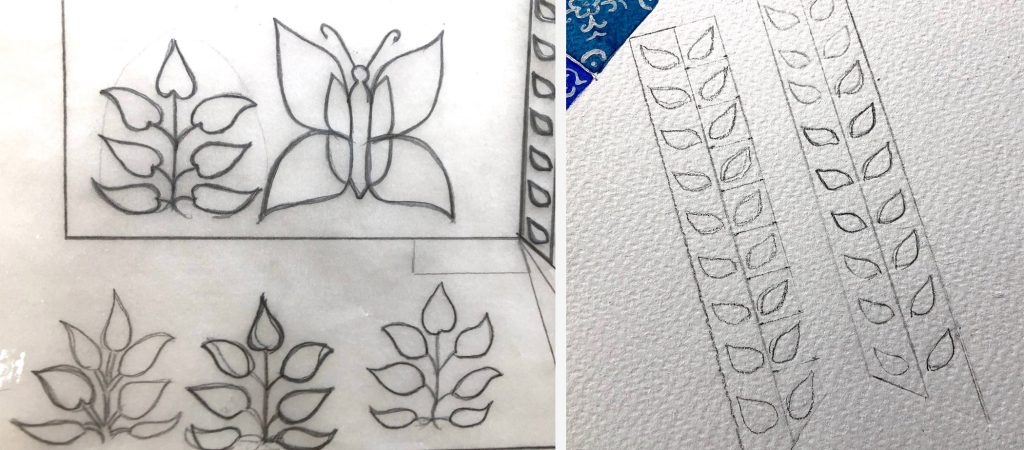
A vibrant butterfly will form the central motif for my work. The surrounding borders will therefore have more subtle tones to highlight the butterfly. Repeat patterns are best designed and drawn on to the page using tracing paper. It also helps when it comes to sizing my drawings accurately into the borders.
Laying it out
The idea of ruling up and carefully laying out the page and borders is to plan how best the calligraphy will appear on the page. It needs to have plenty of space. I want the text, within its surrounding borders, to look easy on the eye – not too crowded.
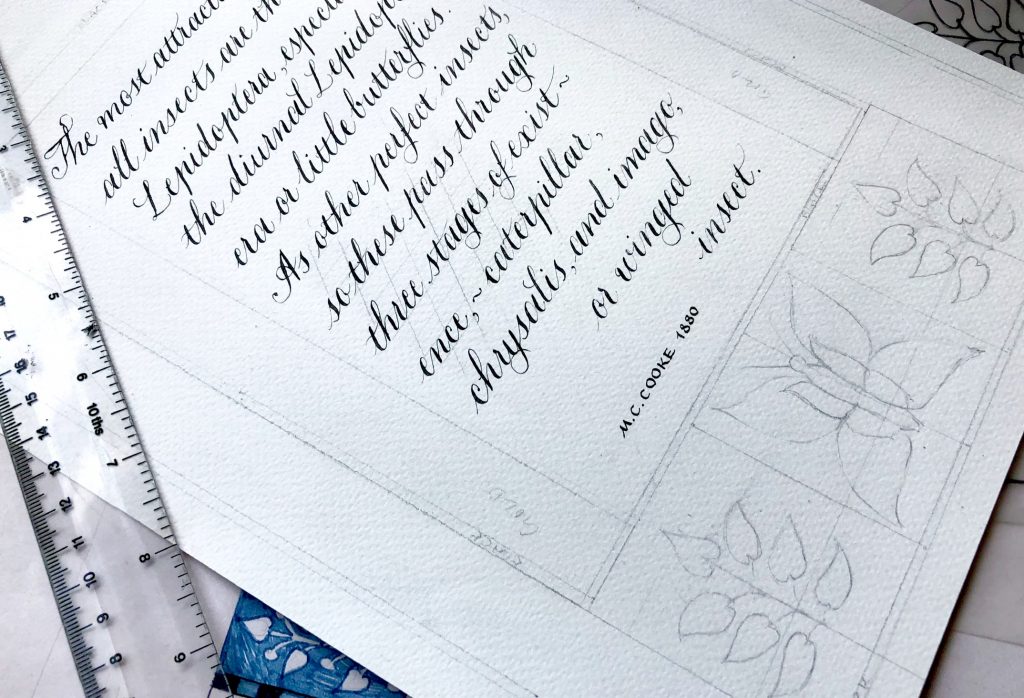
My plan is to have two decorative borders alongside each other at each side of the text, with the butterfly centred at the bottom, and two foliage motifs on each side. Each of these three motifs are to be within an enclosed border.
Bringing it all together
Switch off all your devices and give yourself plenty of time for this bit! It’s my favourite part of the whole process. Adding the colour and delicate final touches to my work brings all the planning and preparation together. (I like to protect the page from any paint smudges by keeping a piece of paper between my hand and the original calligraphy work – just a useful tip!)
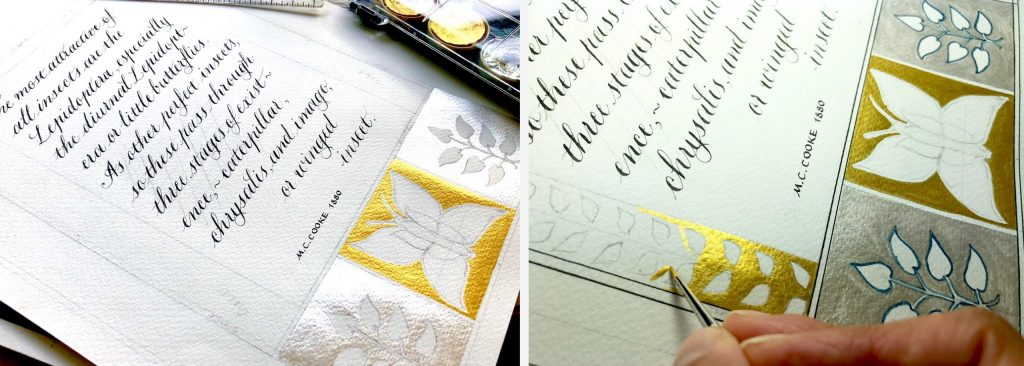
I start by carefully painting those areas that I want to really stand out with gold and silver watercolours.
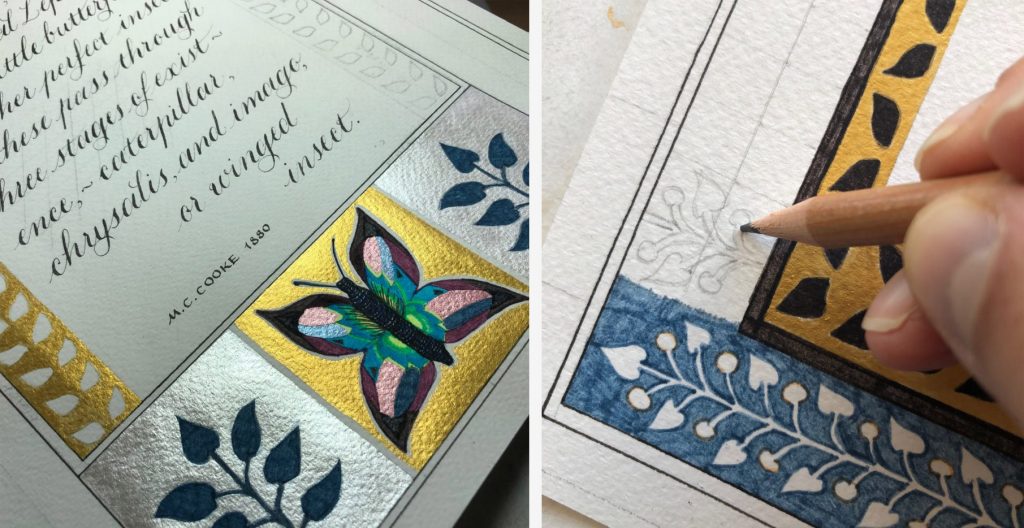
Building up the design using fineliner pens and filling in small areas of the border with intricate pencil drawings is all part of bringing the design and colour together and gradually achieving an effective overall style. Slowly but surely. Bit by bit.
Just a final thought…
It’s always really satisfying to see how I can enhance my calligraphy work by taking the time to plan and design my own decorative border.

Much of the appeal of creating a beautiful border is that it is designed and created by hand. Yes, it does demand time and a great deal of focus (plus heaps of patience), but for a while I can step out of my digitised world, with its many distractions, and withdraw into my less fussy human space. Isn’t that worth it?


